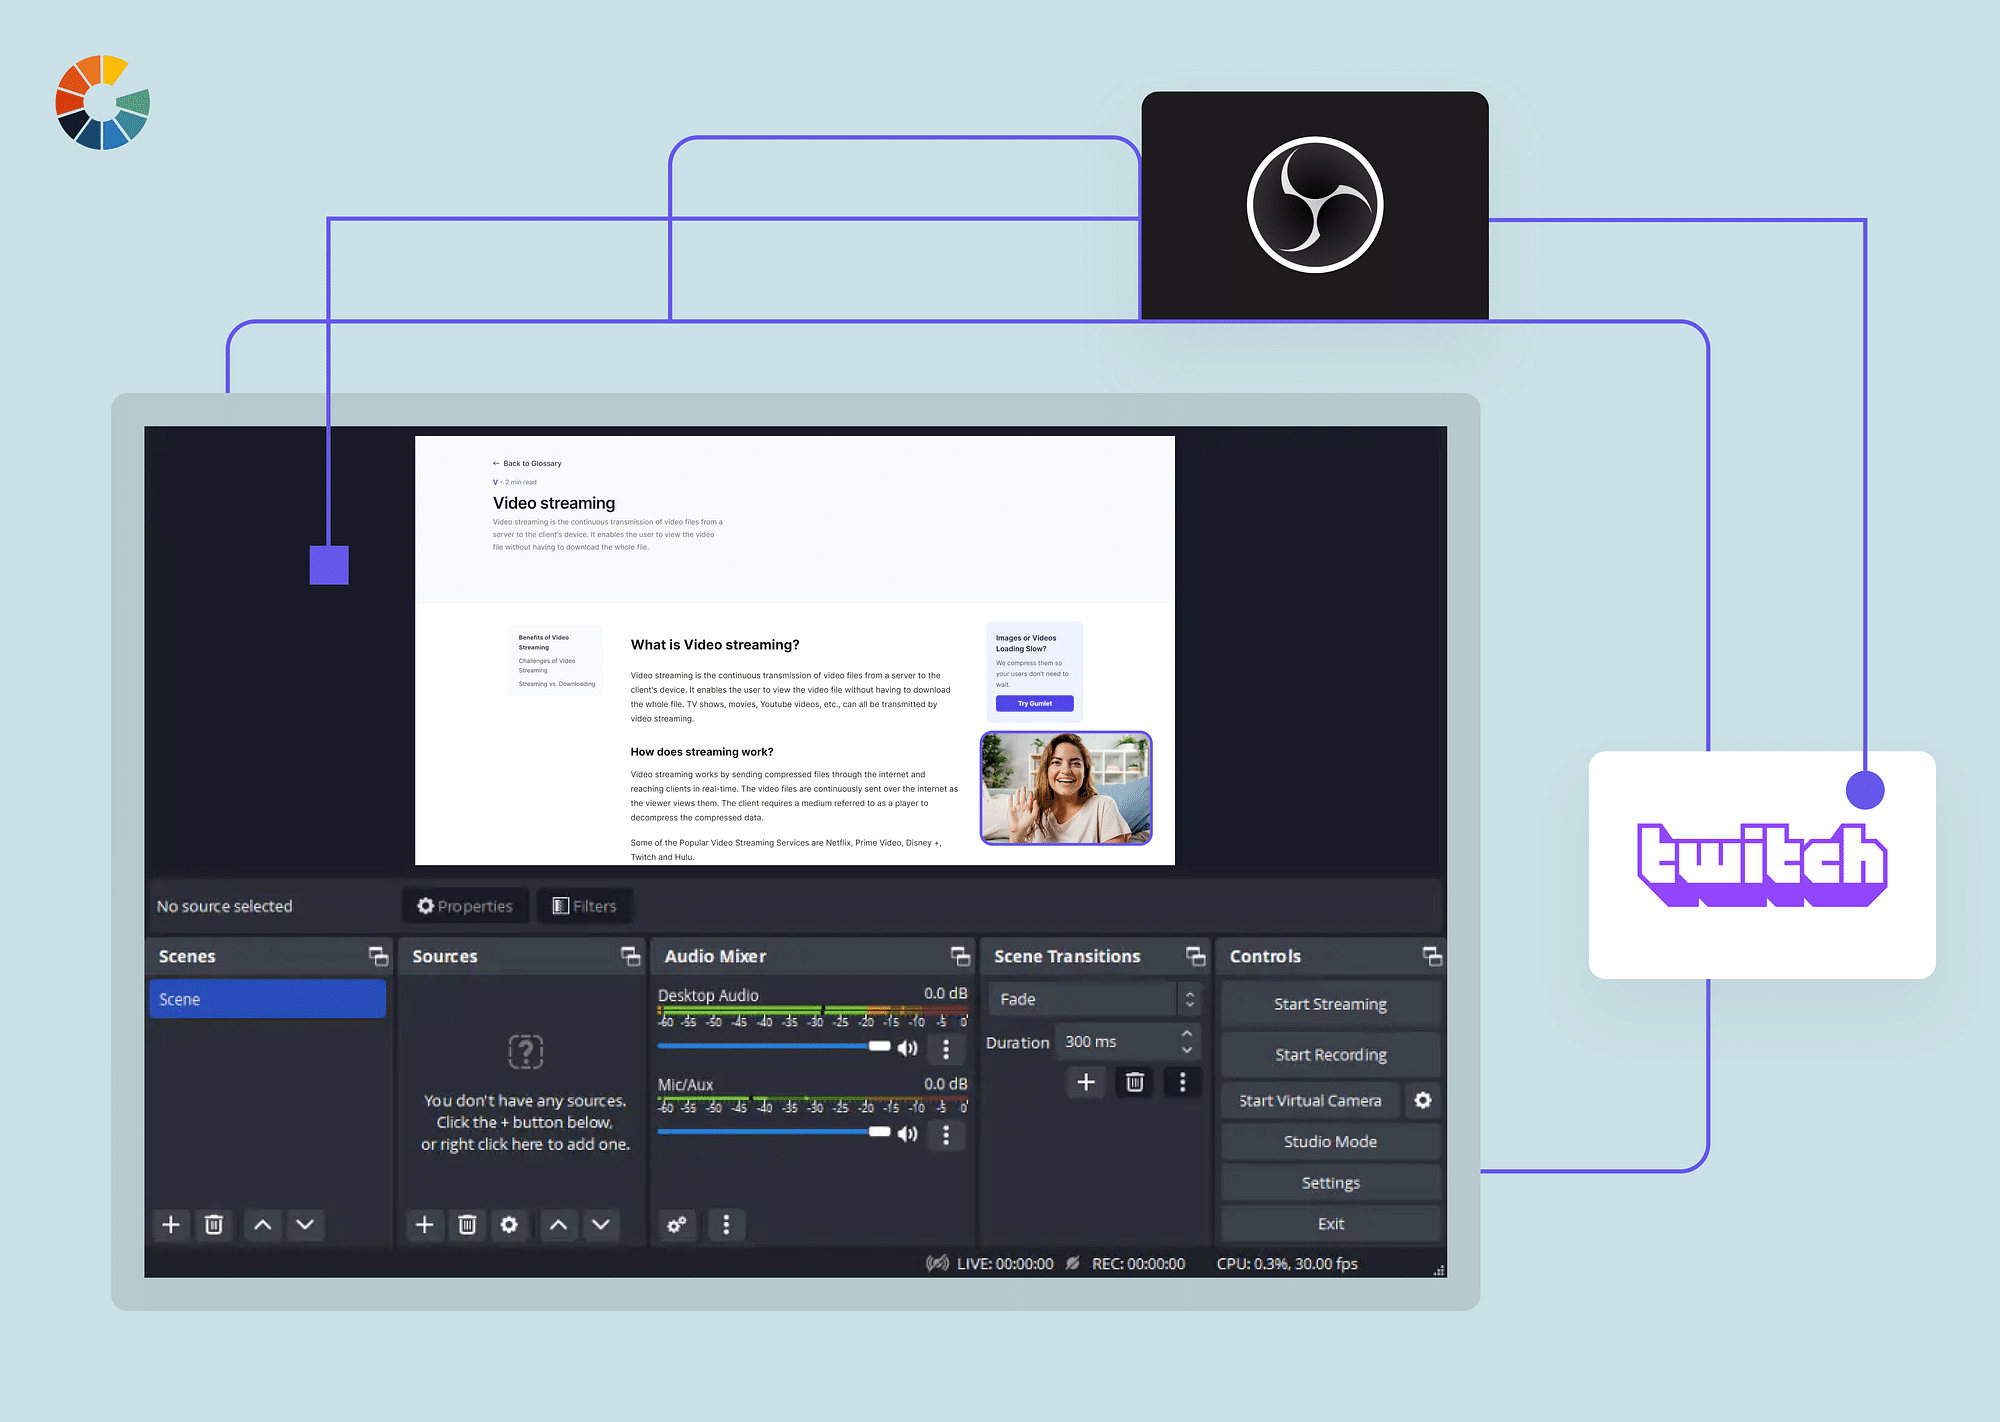
When streaming on Twitch, the right software can make all the difference. You’ll find that OBS (Open Broadcaster Software) is a top choice over Twitch Studio for most streamers. Why? Because it offers a wide range of customization options and greater flexibility. With OBS, you can create dynamic stream layouts, use scene transitions, include overlays and alerts, modify audio/video settings, and whatnot. Plus, OBS is free to download and works on various platforms. You can download OBS Studio for free from their official website here.
How to connect OBS to Twitch?
Here's a step-by-step guide for setting up OBS for Twitch:
- First, get your Twitch stream key; it's pretty straightforward:
- Log in to your Twitch account.
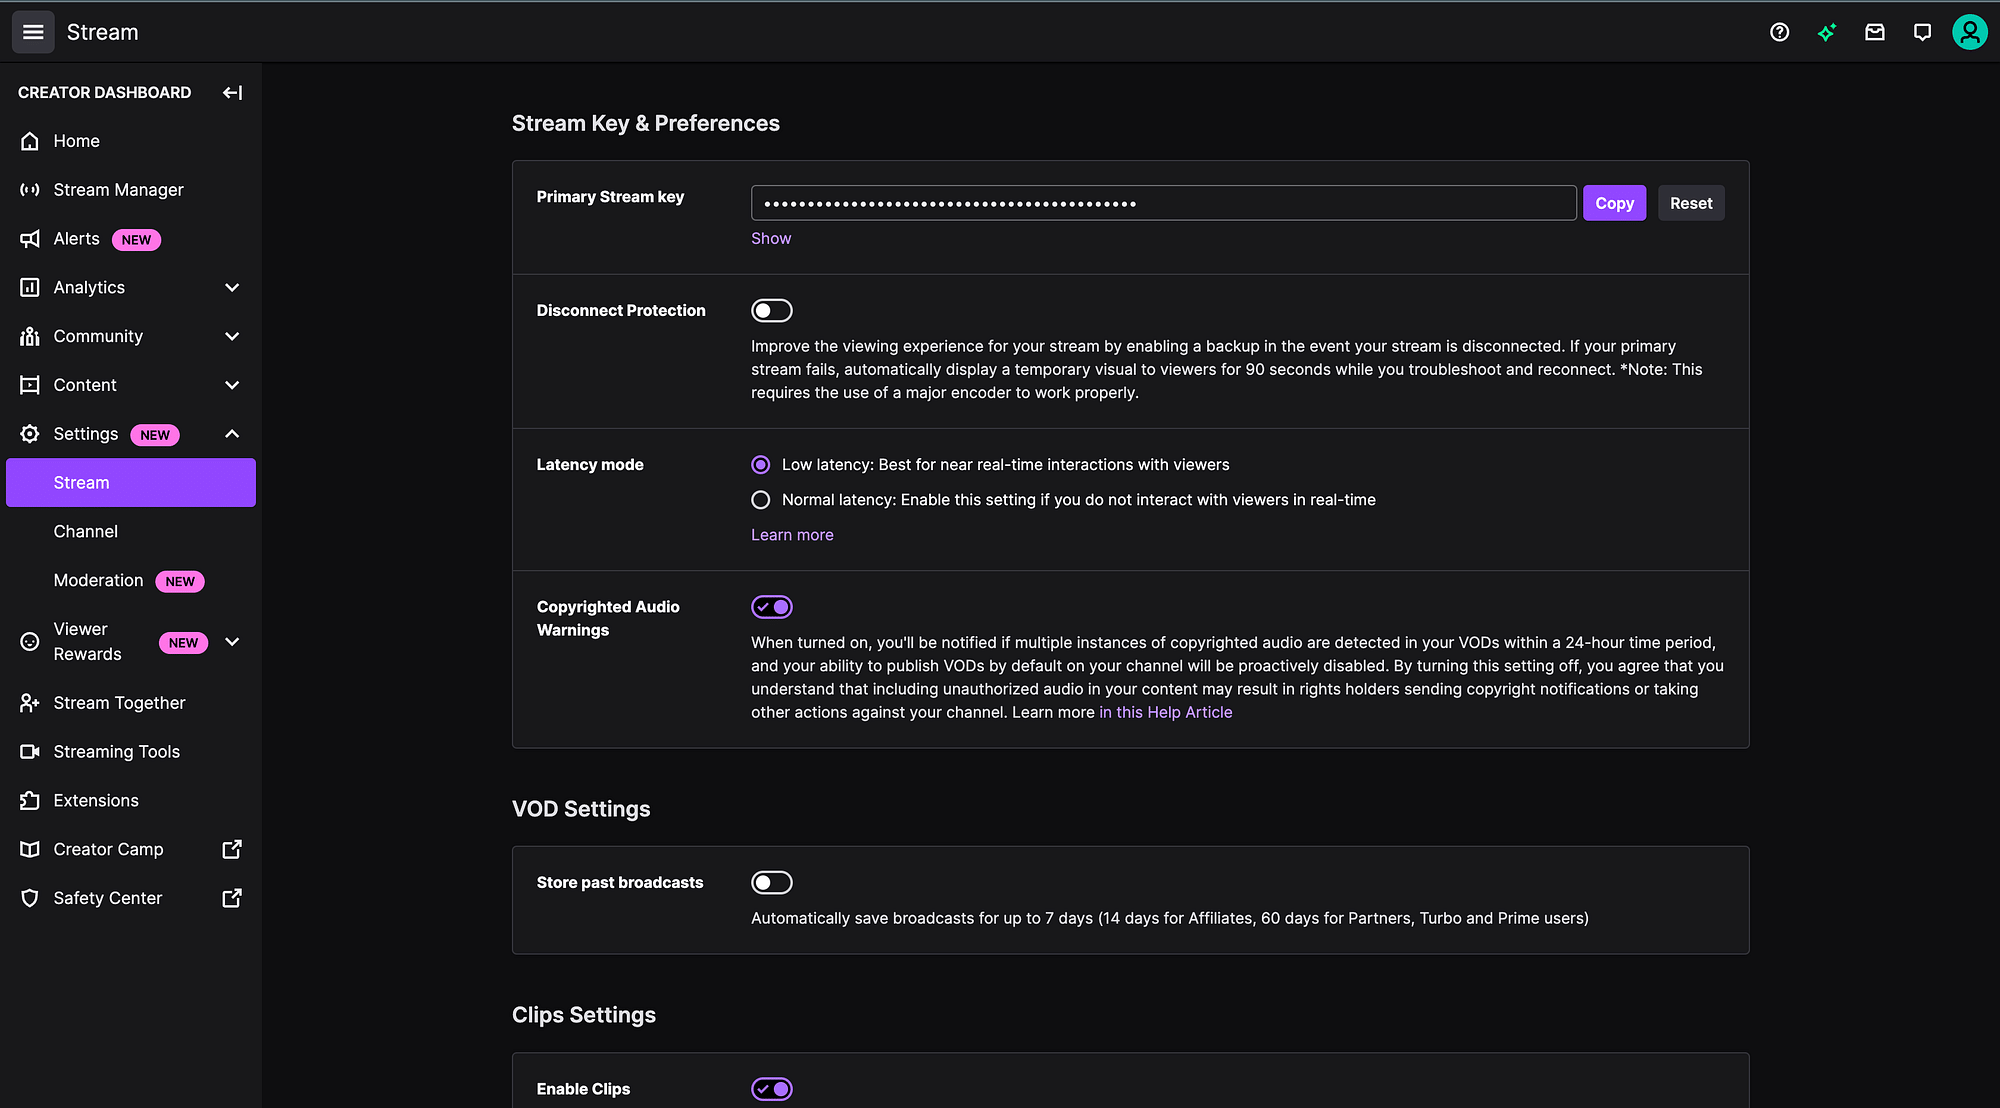
- Click on your profile icon at the top-right corner and select "Creator Dashboard."
- In the left sidebar, click on "Settings" and then choose "Stream."
- Click on the "Copy" button to copy your stream key to your clipboard. This allows OBS to stream directly to your Twitch channel.
- You will find the "Primary Stream Key" section.
- Next, if you haven't already, download OBS Studio and install it on your computer. Once installed, launch OBS Studio.
- Then, you need to configure OBS Studio: Open OBS Studio and click on "Settings" at the bottom-right corner of the screen.
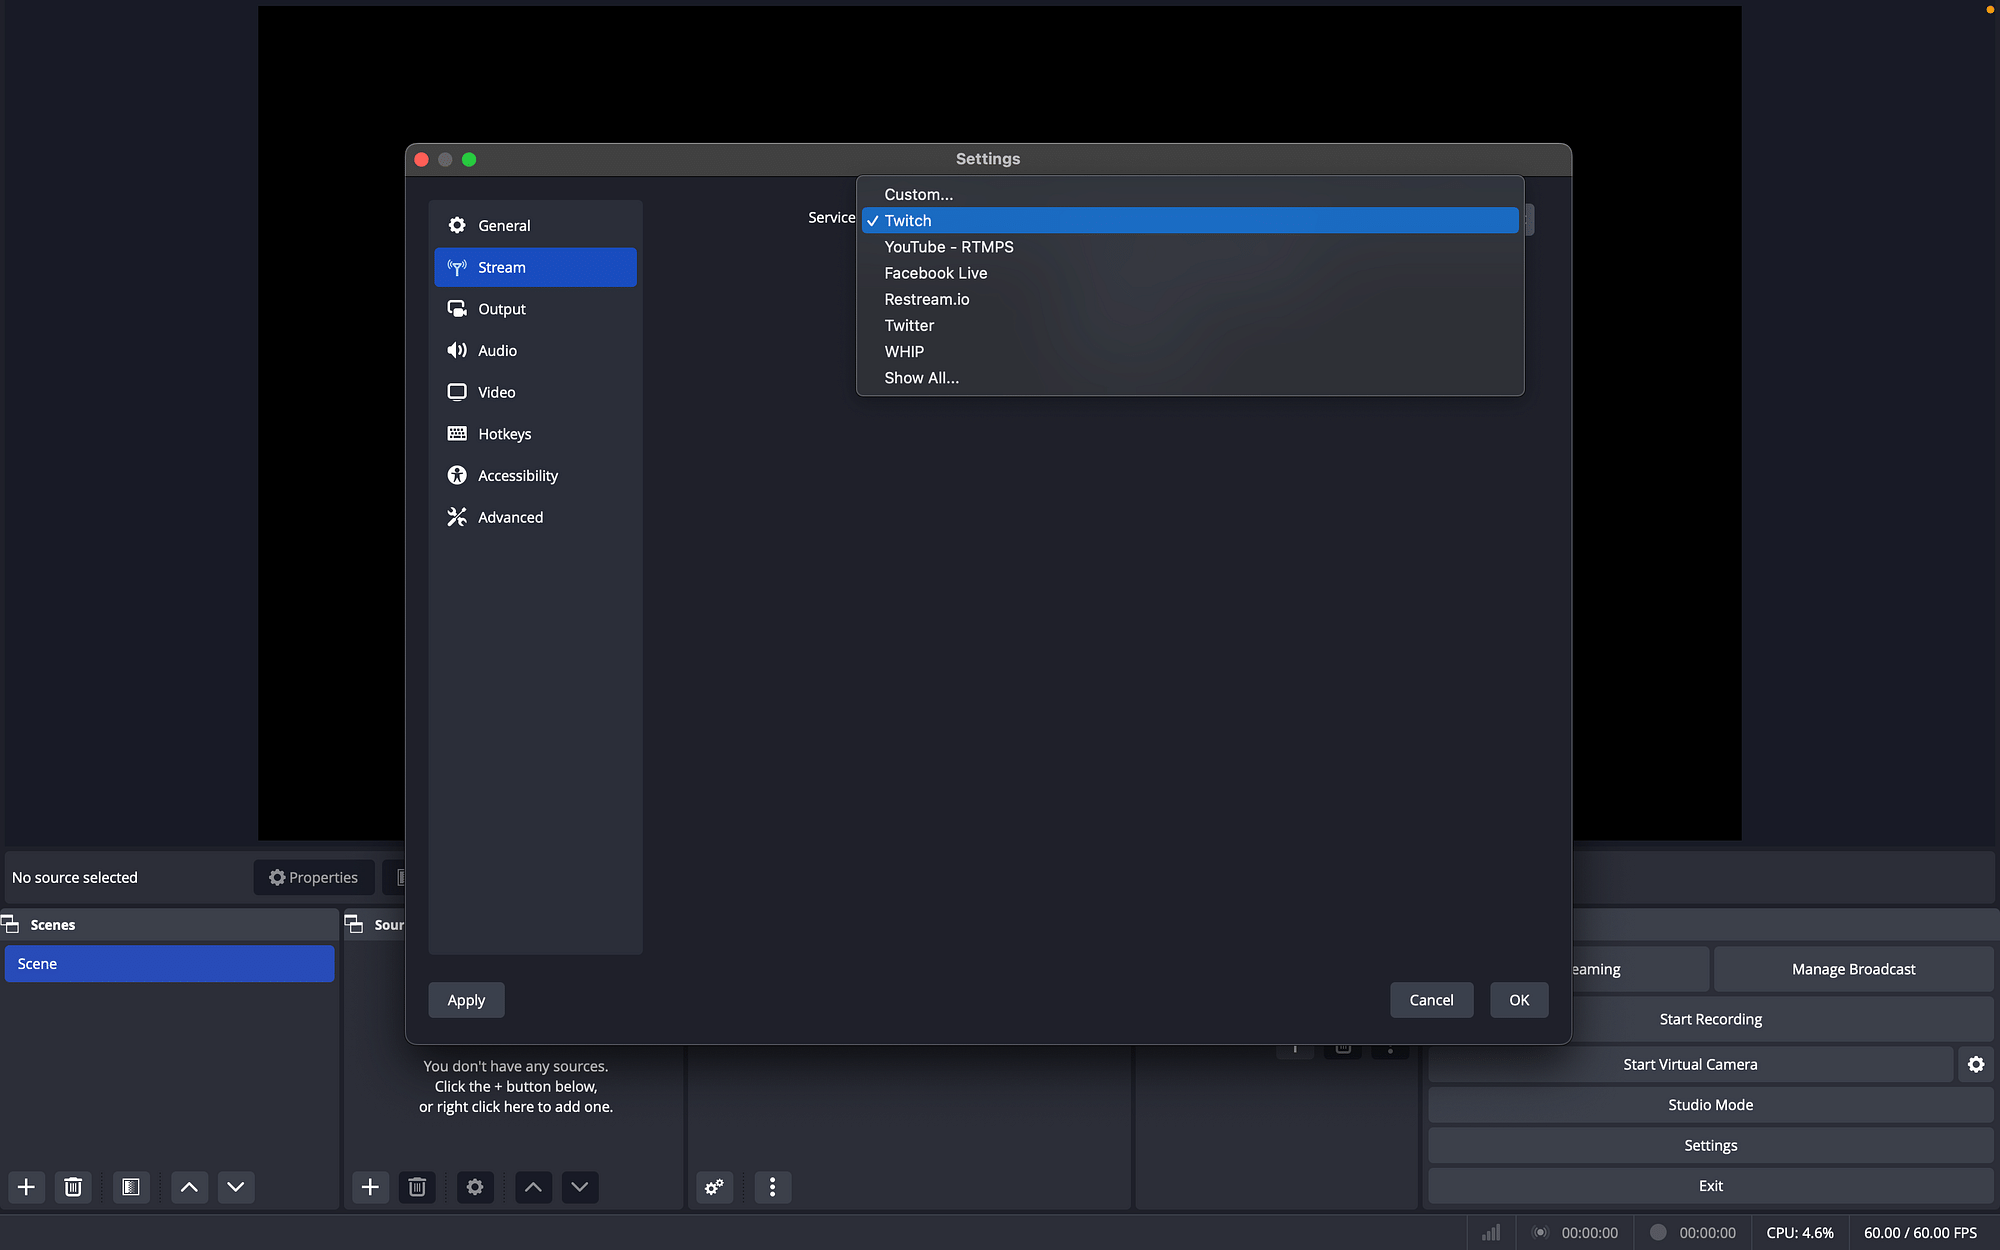
- Under the Settings window, go to the "Stream" tab on the left sidebar.
- Select "Twitch" from the dropdown menu for "Service,”
- Paste your Twitch stream key into the "Stream Key" field. You can do so by right-clicking and selecting "Paste" or using Ctrl + V.
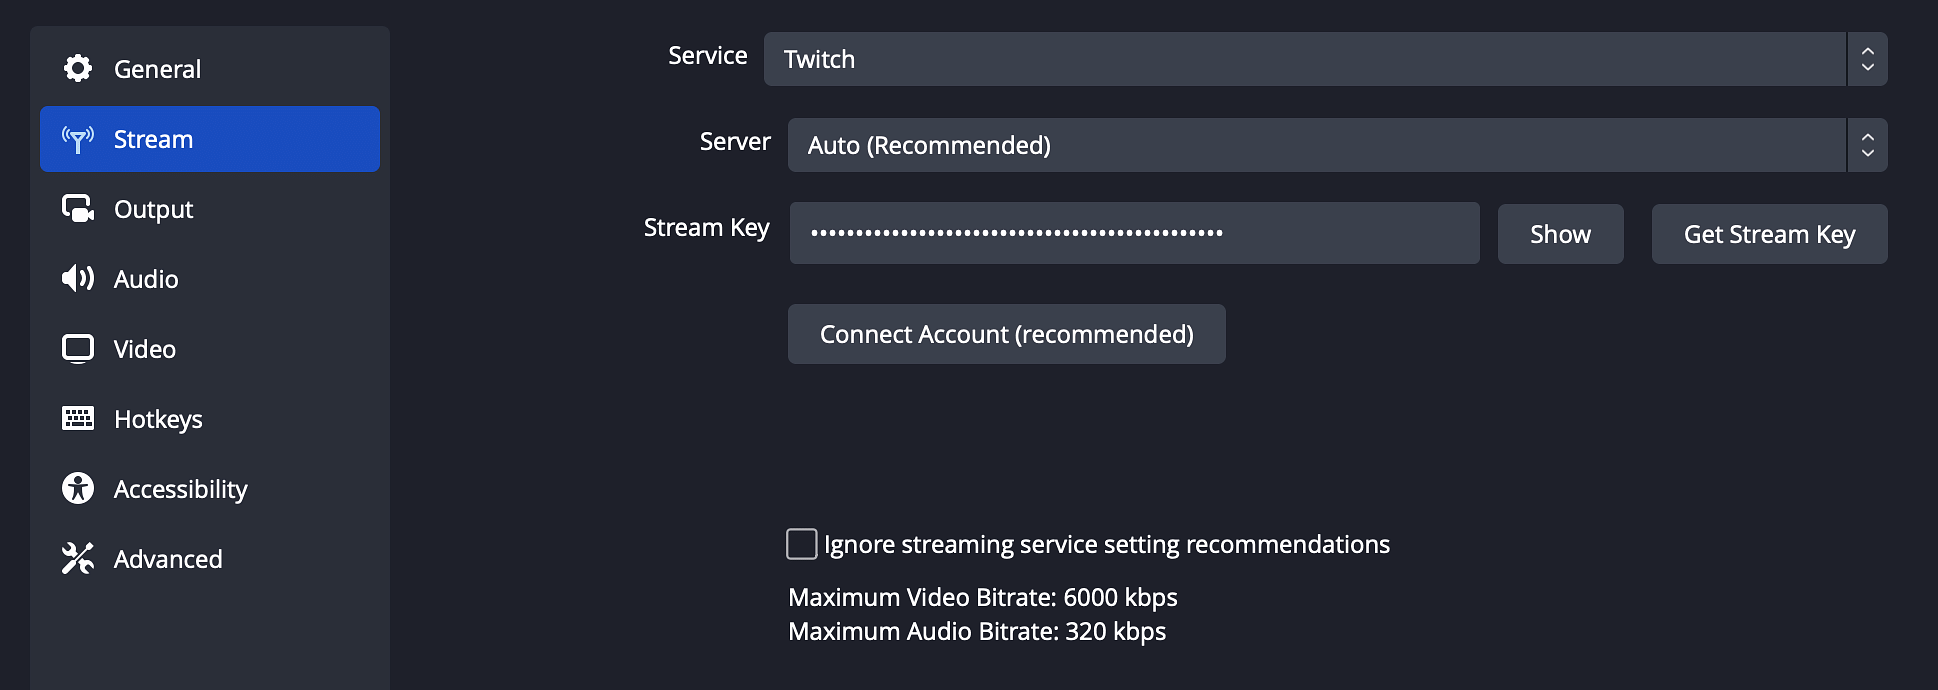
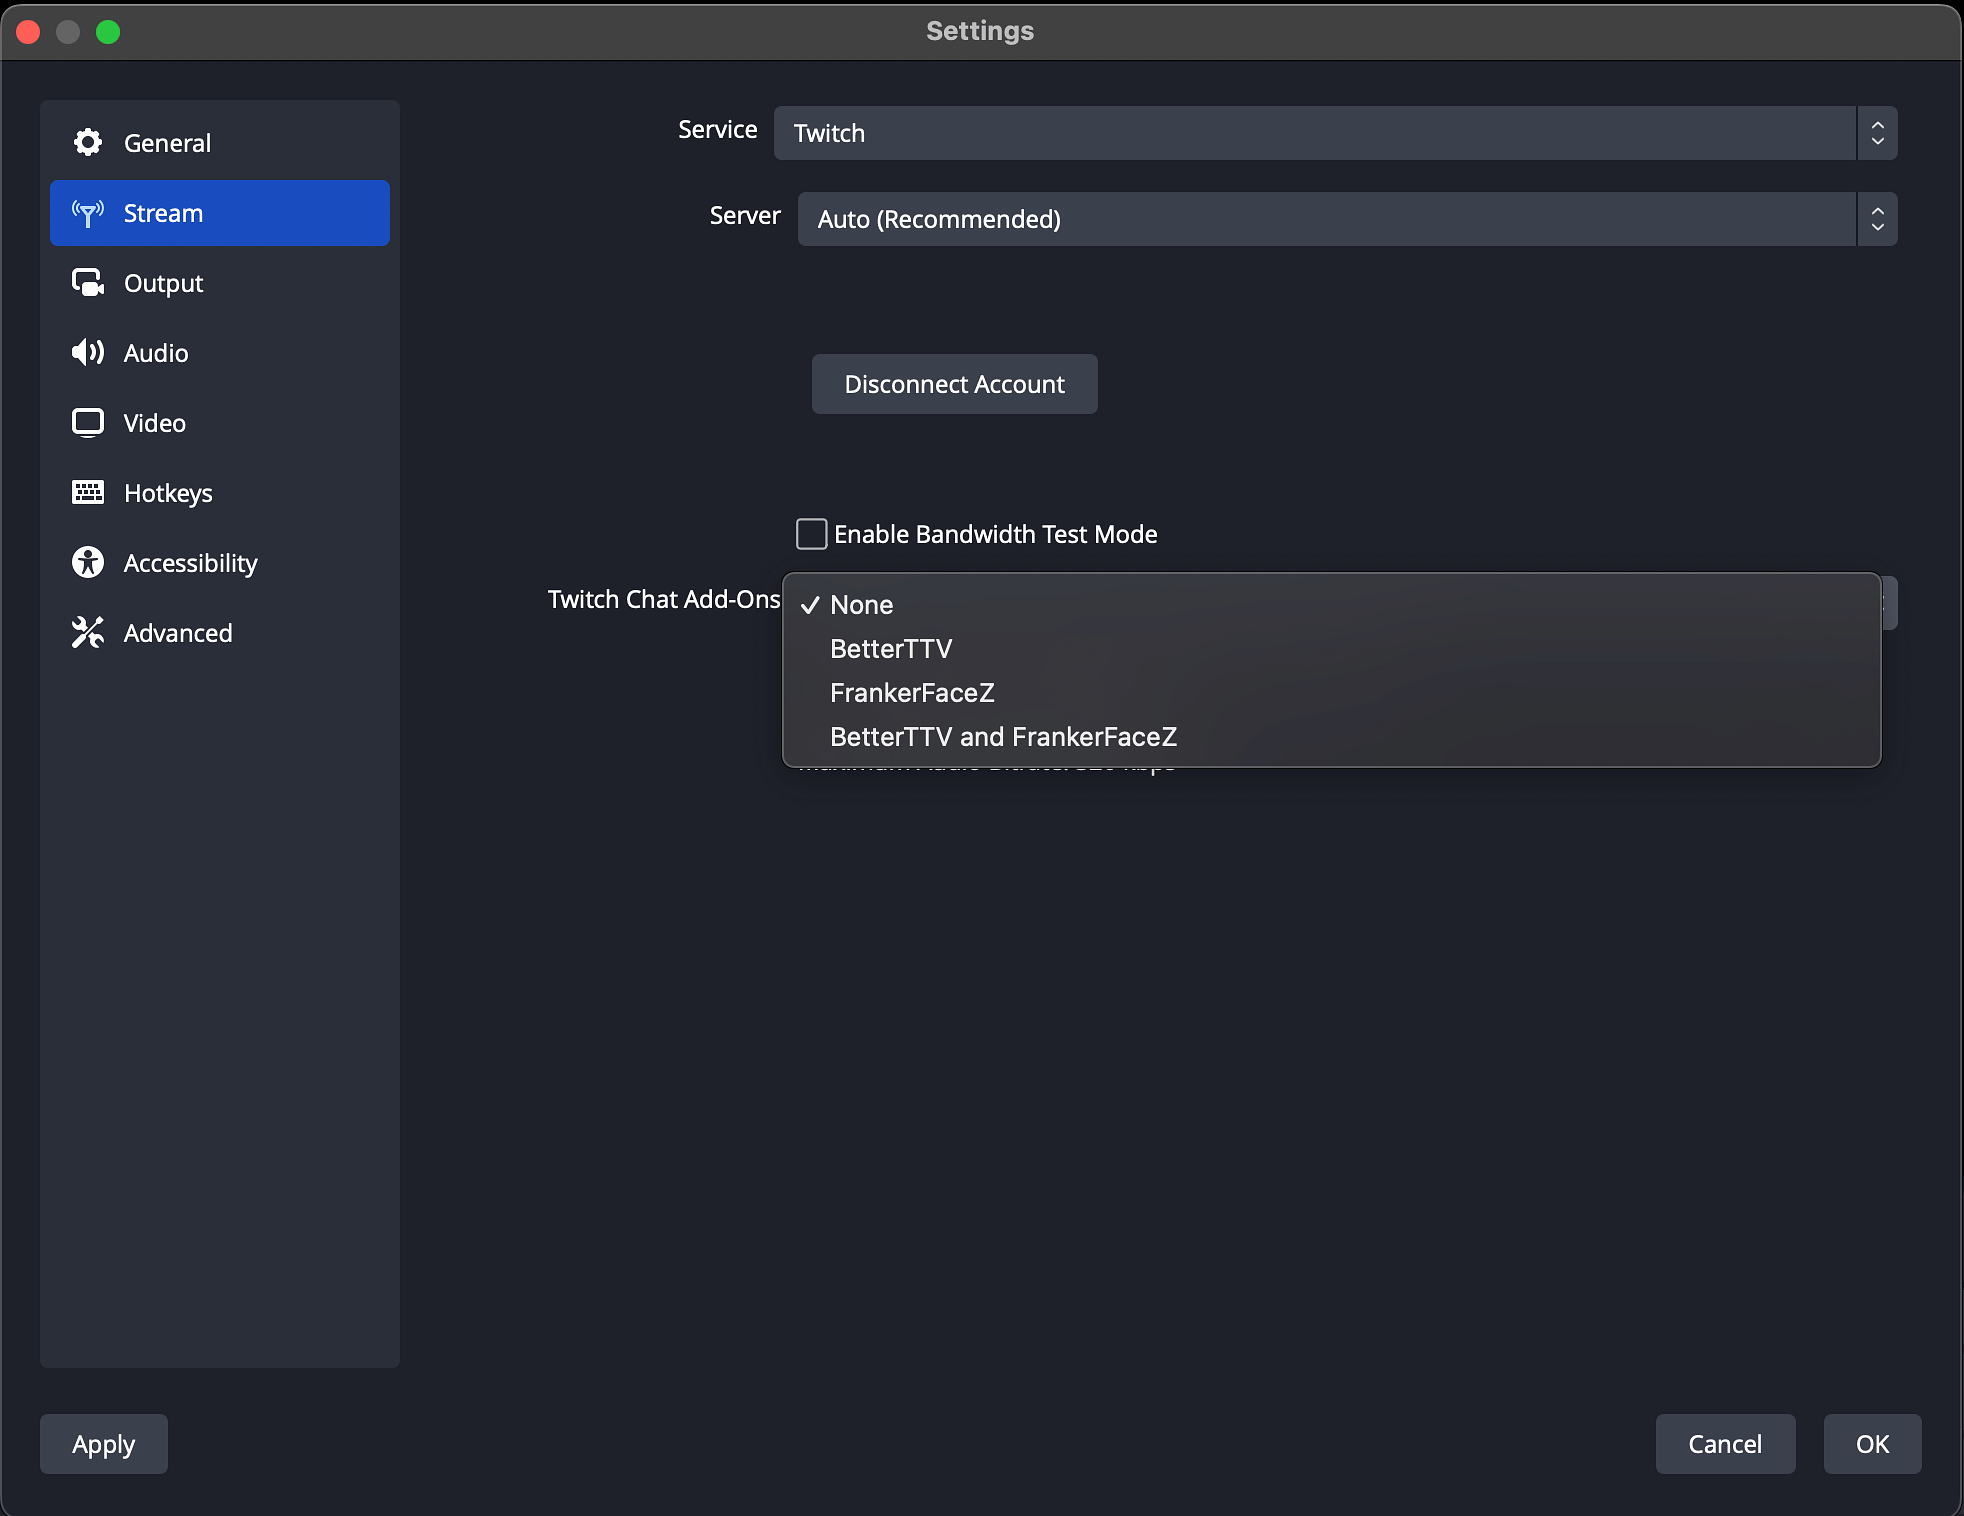
- You can then move on to connect your Twitch Account to your OBS by clicking on "Connect Account".
- Once done, you will have an option to select "Twitch Chat Add-Ons" too.
That’s it! You’re ready to start streaming on Twitch with OBS now.
How to set up OBS for Twitch Stream?
Broadcasting on Twitch isn’t overly complex, but there are a number of steps to follow; the first step is to set up OBS (Open Broadcaster Software) to get your live stream up and running. Here’s a step-by-step guide to help you get started:
Adding Sources
You’ll need different sources in OBS to capture all elements of your stream, starting with your gameplay:
Game Capture: This is for capturing your game window.
- Click the + button under the "Sources" section.
- Click on "macOS Screen Capture" (for mac devices). For Windows, it would be a similar Screen Capture Option.
- Click on "Create New "and name it something convenient, e.g., "Game Capture", and click "OK".
- The below window will display on the screen. Choose "Application Capture" in the Method Section.
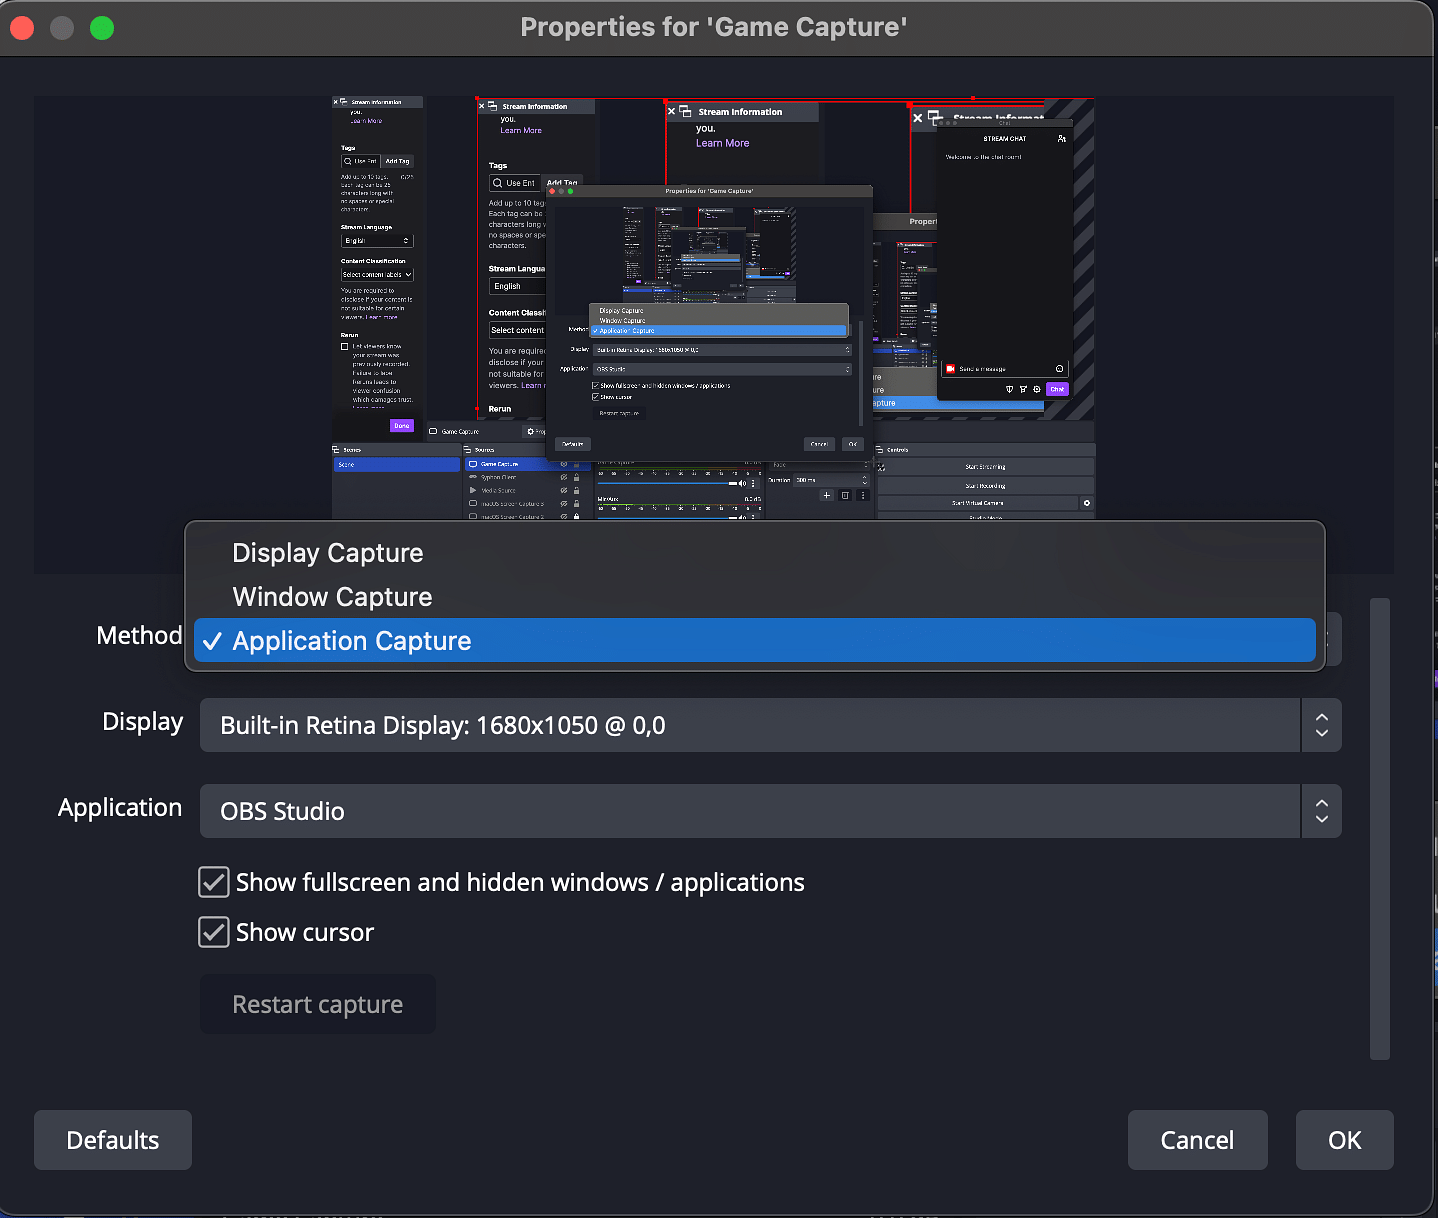
- Move to "Application" Section to select the Game Application. Choose your game from the dropdown list.
- Click "OK" and you are good to go.
Other Capture Methods:
Window Capture: This captures a specific window.
- Click the + button under "Sources."
- Click on "macOS Screen Capture" (for mac devices). For Windows, it would be a similar Screen Capture Option.
- Click on "Create New "and name it something convenient and click "OK".
- The below window would be displayed. You can choose "Window Capture" here and click "OK".
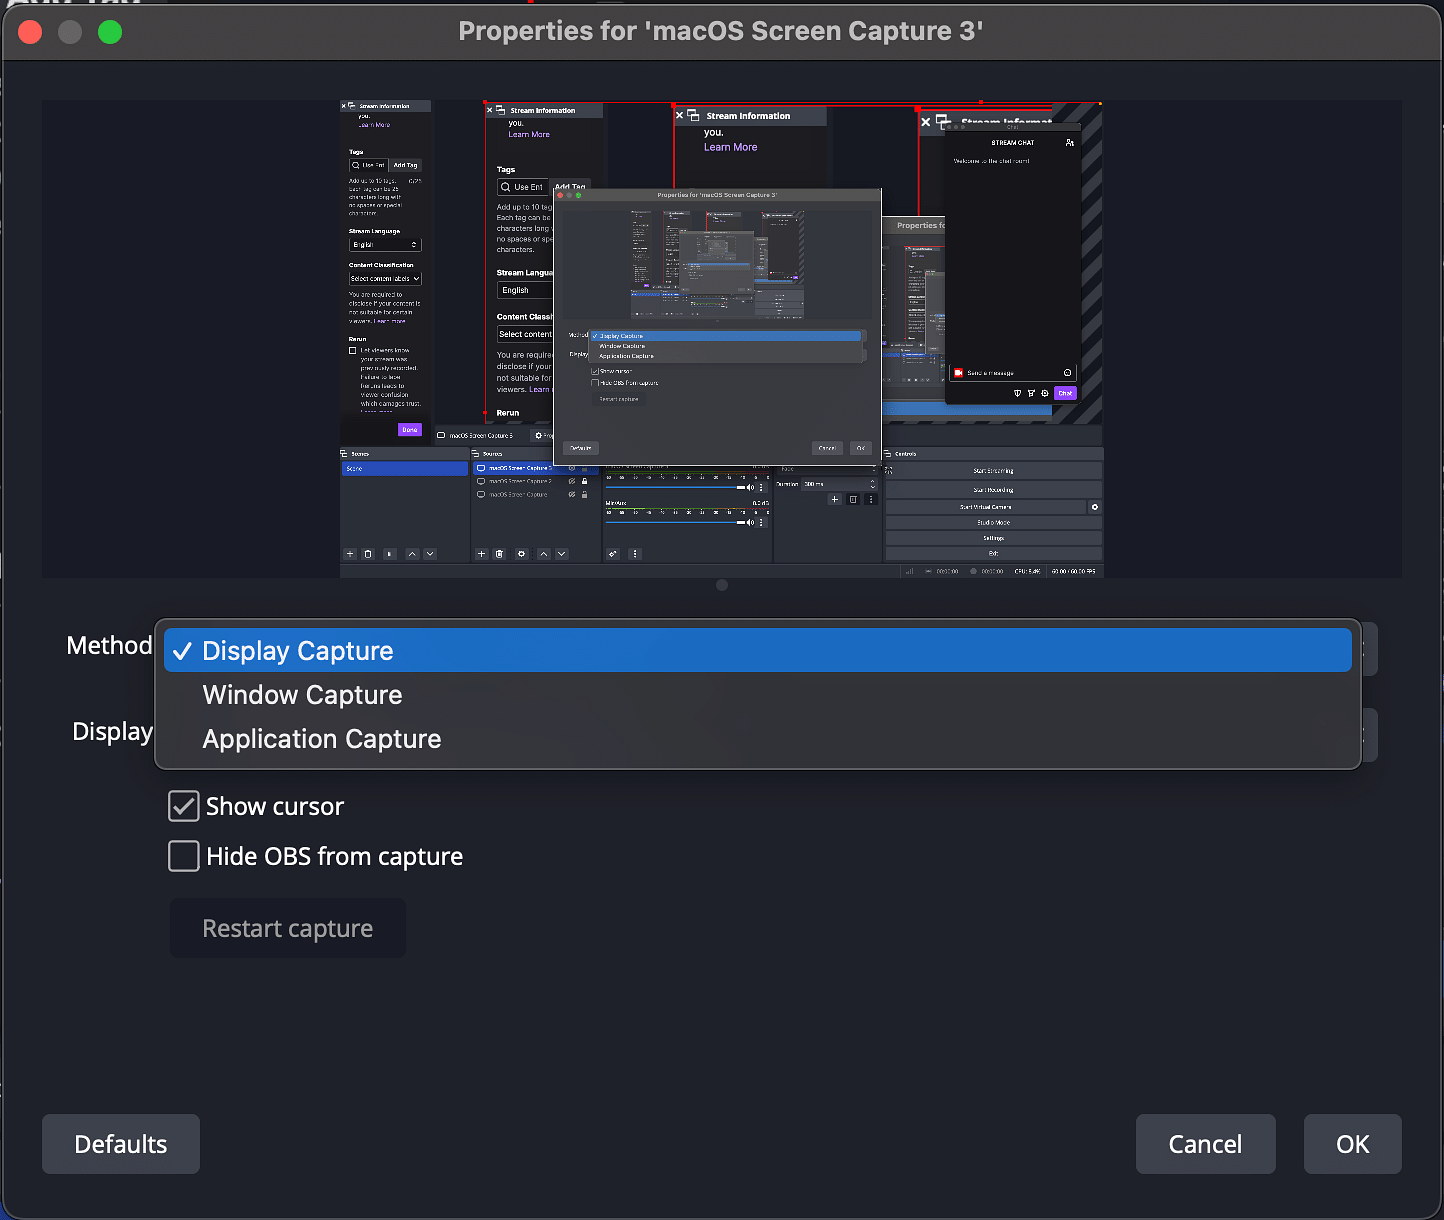
Display Capture: This captures your entire screen.
- Follow the similar process as shown above for "Window Capture".
- Choose "Display Capture" in Method instead of Window Capture and click "OK"
Setting up your Webcam/Mic
These are crucial for interacting with your audience:
Webcam: To add your webcam feed,
- Click the + button under "Sources."
- Select "Video Capture Device."
- Name it and choose your webcam from the list.
- Adjust settings like resolution and framerate to match your preferences.
Microphone: For adding your voice,
- Click the + button under "Sources."
- Choose "Audio Input Capture."
- Name it and select your microphone from the list.
- Adjust audio levels to ensure your voice comes through clearly and adjust noise suppression as needed
Adding Additional Sources
You can enhance your stream with extra visuals and notifications:
Images: Add overlays or logos,
- Click the + button under "Sources."
- Select "Image."
- Name it and browse to add your image file.
- Adjust its position and size on your stream layout to match your branding.
Alerts/Browser Sources: Include notifications or widgets,
- Click the + button under "Sources."
- Choose "Browser" for web-based sources.
- Enter the URL provided by your alert service or widget provider to display alerts or integrate widgets seamlessly.
Going Live
Prepare to start your broadcast:
- Make sure you optimize your Twitch stream settings like bitrate and resolution. You'll find this under Settings > Output.
- If everything looks perfect, press on "Start Streaming" at the bottom-right of OBS. However, before you go live, do a test stream run to ensure the video looks good, your sound is working great, and your internet connection is stable.
Best OBS Settings for Twitch
These best OBS settings will help you get started with a high-quality stream on Twitch:
Best Video Settings
- Make sure this aligns with your monitor’s native resolution, like 1920x1080. This will ensure that what you are seeing on your screen is exactly what your viewers will see as well.
- For most streams, you should ideally choose 1280x720 (720p). This helps strike a good balance between stream quality and overall performance. If you’ve got a high-level desktop and swift internet, you can bump it up to 1920x1080 (1080p) for more defined visuals.
- If you're scaling down your resolution, you should ideally choose “Lanczos (32 samples)” for top quality. This will smooth out the image and eliminate any jagged edges, resulting in a cleaner, seamless stream.
- Setting your FPS to 30 is usually good enough for streaming and eases the load on your system. But if your setup can handle it and you want super smooth video, aim for 60 FPS.
Best Audio Settings
- First up, you'll want to set the sample rate to 48 kHz. This will ensure high-quality audio that captures all the details in your sound.
- When it comes to channels, go with “Stereo.” It’s perfect for most streams; it gives you clear and balanced audio without unnecessarily overcomplicating things.
- Next, for your mic setup, choose your microphone from the dropdown under Mic/Auxiliary Audio Device. This mic will be your main input for talking to your viewers, so make sure you do a quality check.
- Make sure to select your main audio output device (speakers or headphones); you'll find this setting under desktop Audio Device.
- Finally, under the Output tab, set your audio bitrate to 320 kbps. This setting will ensure the highest quality output so your viewers can hear you loud and clear.
In addition to the above specific video and audio settings, there are a few other general settings in OBS that can boost your streaming and recording experience.
- Firstly, under the Advanced settings, you should set the Process Priority to “Above Normal” to ensure OBS gets enough CPU resources to run smoothly. This will minimize lag or dropped frames.
- Next, you should choose “Direct3D 11” for the Renderer since it’s known to be the most compatible and efficient option for the majority of systems.
- Set the YUV Color Space to “709” and the YUV Color Range to “Full” to ensure accurate and vibrant color representation.
- For Color Format, “NV12” is the best option; it helps strike the right balance between performance and quality.
- Finally, enable the option to “Dynamically change bitrate to manage congestion”.
Best Practices for Twitch Stream Optimization with OBS
Where streaming games on Twitch is concerned, broadcasting high-quality streams is critical for success. For this, you need to make sure your Twitch stream settings are optimized with OBS. Here’s a step-by-step guide to help you set up OBS for the best broadcasts.
- First off, open OBS and click on Settings at the bottom right.
- Then go to the Output tab on the left and switch to Advanced mode so you can tweak more settings.
- One key thing to remember here is your encoder. It typically depends on the hardware you're using.
- If you have an NVIDIA graphics card, you should opt for the NVENC encoder. It will ensure efficient hardware encoding.
- AMD GPU users, on the other hand, should ideally choose AMF for optimized performance for AMD hardware.
- If your hardware doesn’t work with NVENC or AMF, or if you don't mind higher CPU usage that is typically associated with high-quality encoding, you should go for the x264 encoder.
- Now, as for your stream's rate control, make sure to stick with CBR. That's where your internet speed comes into play. If you're aiming for 1080p at 60 frames per second, you need to set your bitrate around 6000 Kbps. For lesser resolutions or frame rates, roughly 4500 Kbps should do the trick.
- Finally, to really dial up that top-notch stream quality, go for a framerate of 60 FPS or 50 FPS. Following this, set your keyframe interval to 2 seconds, pick your desired Quality preset, and set B-frames to 2. These settings are prerequisites to streaming at 1080p and 60 FPS.
Troubleshooting for Twitch Streaming Setup with OBS
Troubleshooting streaming problems can be a bit tricky, but let’s break it down to get you sorted.
- First off, OBS Studio 24.0 introduced a neat feature called Dynamic Bitrate. It automatically adjusts your bitrate to handle network congestion, which can really help smooth out your stream. If your bitrate fluctuates or your stream isn’t stable day-to-day, try tweaking your stream bitrate and output settings in OBS. Sometimes lowering the bitrate or adjusting the resolution and frame rate can make a big difference.
- Switching to a different streaming server can also help. Sometimes, one server might be overloaded, causing connection issues. Testing your stream on another service can also pinpoint if the problem is with OBS or something else.
- For Windows users, enabling network optimizations like event-based API and detailed logging in OBS settings might provide more insights into what’s causing the issue. Also, double-check your IP binding settings to ensure everything is correctly set up to avoid connection failures.
- Sometimes, security software like antivirus or firewall programs can interfere with OBS. Try temporarily disabling them or adding exceptions for OBS to see if that clears up the problem. Also, if you have any network optimization tools installed, they might clash with OBS, so consider uninstalling them.
- Make sure your network adapter drivers are up to date. You can do this through Windows Update or by visiting the manufacturer’s website for the latest drivers. And when it comes to hardware, using a wired Ethernet connection instead of Wi-Fi can significantly improve stability.
- Check your firewall and router settings as well. Make sure the correct ports (like TCP port 1935) are open for streaming. Testing different network cards or cables can also rule out any hardware issues causing trouble.
If you’ve tried all this and still face issues, it might be time to contact your Internet Service Provider (ISP). They can check if there’s any network maintenance or throttling affecting your connection, which could be causing your streaming woes.
Conclusion
For streamers, Twitch is a powerful and highly resource-efficient platform to distribute their gameplay or other streams. The platform attracts over 241.7 million unique visitors every year. Streaming on Twitch with OBS allows you to capture video games, incorporate overlays, modify video/audio settings, as well as endlessly customize your streams as per your preference. In this guide, we've discussed everything a Twitch streamer needs to set up OBS and optimize streams. By now, you should be well-equipped to put together a polished setup and start streaming on Twitch with OBS.
FAQs
- How to put Twitch chat on screen in OBS?
To put Twitch chat on your stream in OBS, you'll want to use a browser source. Here's how to do it:
- Fire up OBS and click the “+” sign under "Sources."
- Click on "Browser," give it a name, and then enter your stream URL which is given to you by Twitch's chat overlay service.
- Or, you can use a URL format like https://www.twitch.tv/popout/<yourusername>/chat — this will automatically display your Twitch chat on the screen.
- How to stream on YouTube and Twitch at the same time?
You can stream on YouTube and Twitch at the same time using Restream.io. Restream.io manages the distribution, so all you need to do is stream once from OBS. Here's how:
- First, log in and link both your Twitch and YouTube accounts with Restream.io.
- Next, get stream keys for both Twitch and YouTube.
- Go to OBS and choose Restream.io as your streaming service. Then, enter your Restream.io stream key (Restream.io provides once you’ve linked your accounts).
- Start your stream in OBS, and your content will get broadcast on both platforms simultaneously.
- Is OBS good for Twitch streaming?
OBS (Open Broadcaster Software) is widely regarded as a powerful tool for resource-efficient streaming. It's free, open-source, and offers customizable features for capturing and streaming. You can also boost its functionality through additional tools/software/plugins.
- How to get a stream key in Twitch?
Getting your Twitch stream key is straightforward.
- Open your preferred browser on your computer and go to the official Twitch website.
- Log in to your Twitch account, navigate to your profile icon at the top right.
- Go to the Creator Dashboard and click on "Settings.
- Move down to find the "Primary Stream Key" section and click on "Copy" to copy the key to your clipboard.
- Paste this key into OBS within the settings, and you're set to start streaming.
- How to get a stream URL in OBS?
Your stream URL in OBS is typically configured by default once you set up your streaming service. Navigate to the “Stream” tab and click on “Custom Streaming Server”. Here, you will find 2 fields: URL and Stream key. Your URL typically looks like this: rtmp://live.twitch.tv/app/<yourstreamkey>
Here, <yourstreamkey> is your unique stream key.