Green screens have become essential for content creators, filmmakers, and even casual video enthusiasts. They offer a unique way to transport subjects to any location or add captivating effects, all while working within the confines of a single studio. By learning how to use a green screen effectively, you can create professional-looking videos that stand out and captivate viewers.
Whether you’re new to video production or looking to enhance your skills, understanding the basics of green screen setup and editing can transform your creative possibilities.
What is a Green Screen?
A green screen is a backdrop that allows video editors to replace the green background with any other image or video, making it a versatile tool in content creation. By filming in front of a green screen, creators can transport their subjects to new environments or add visual effects seamlessly, making it an invaluable technique in filmmaking, streaming, and online videos.
How Does a Green Screen Work?
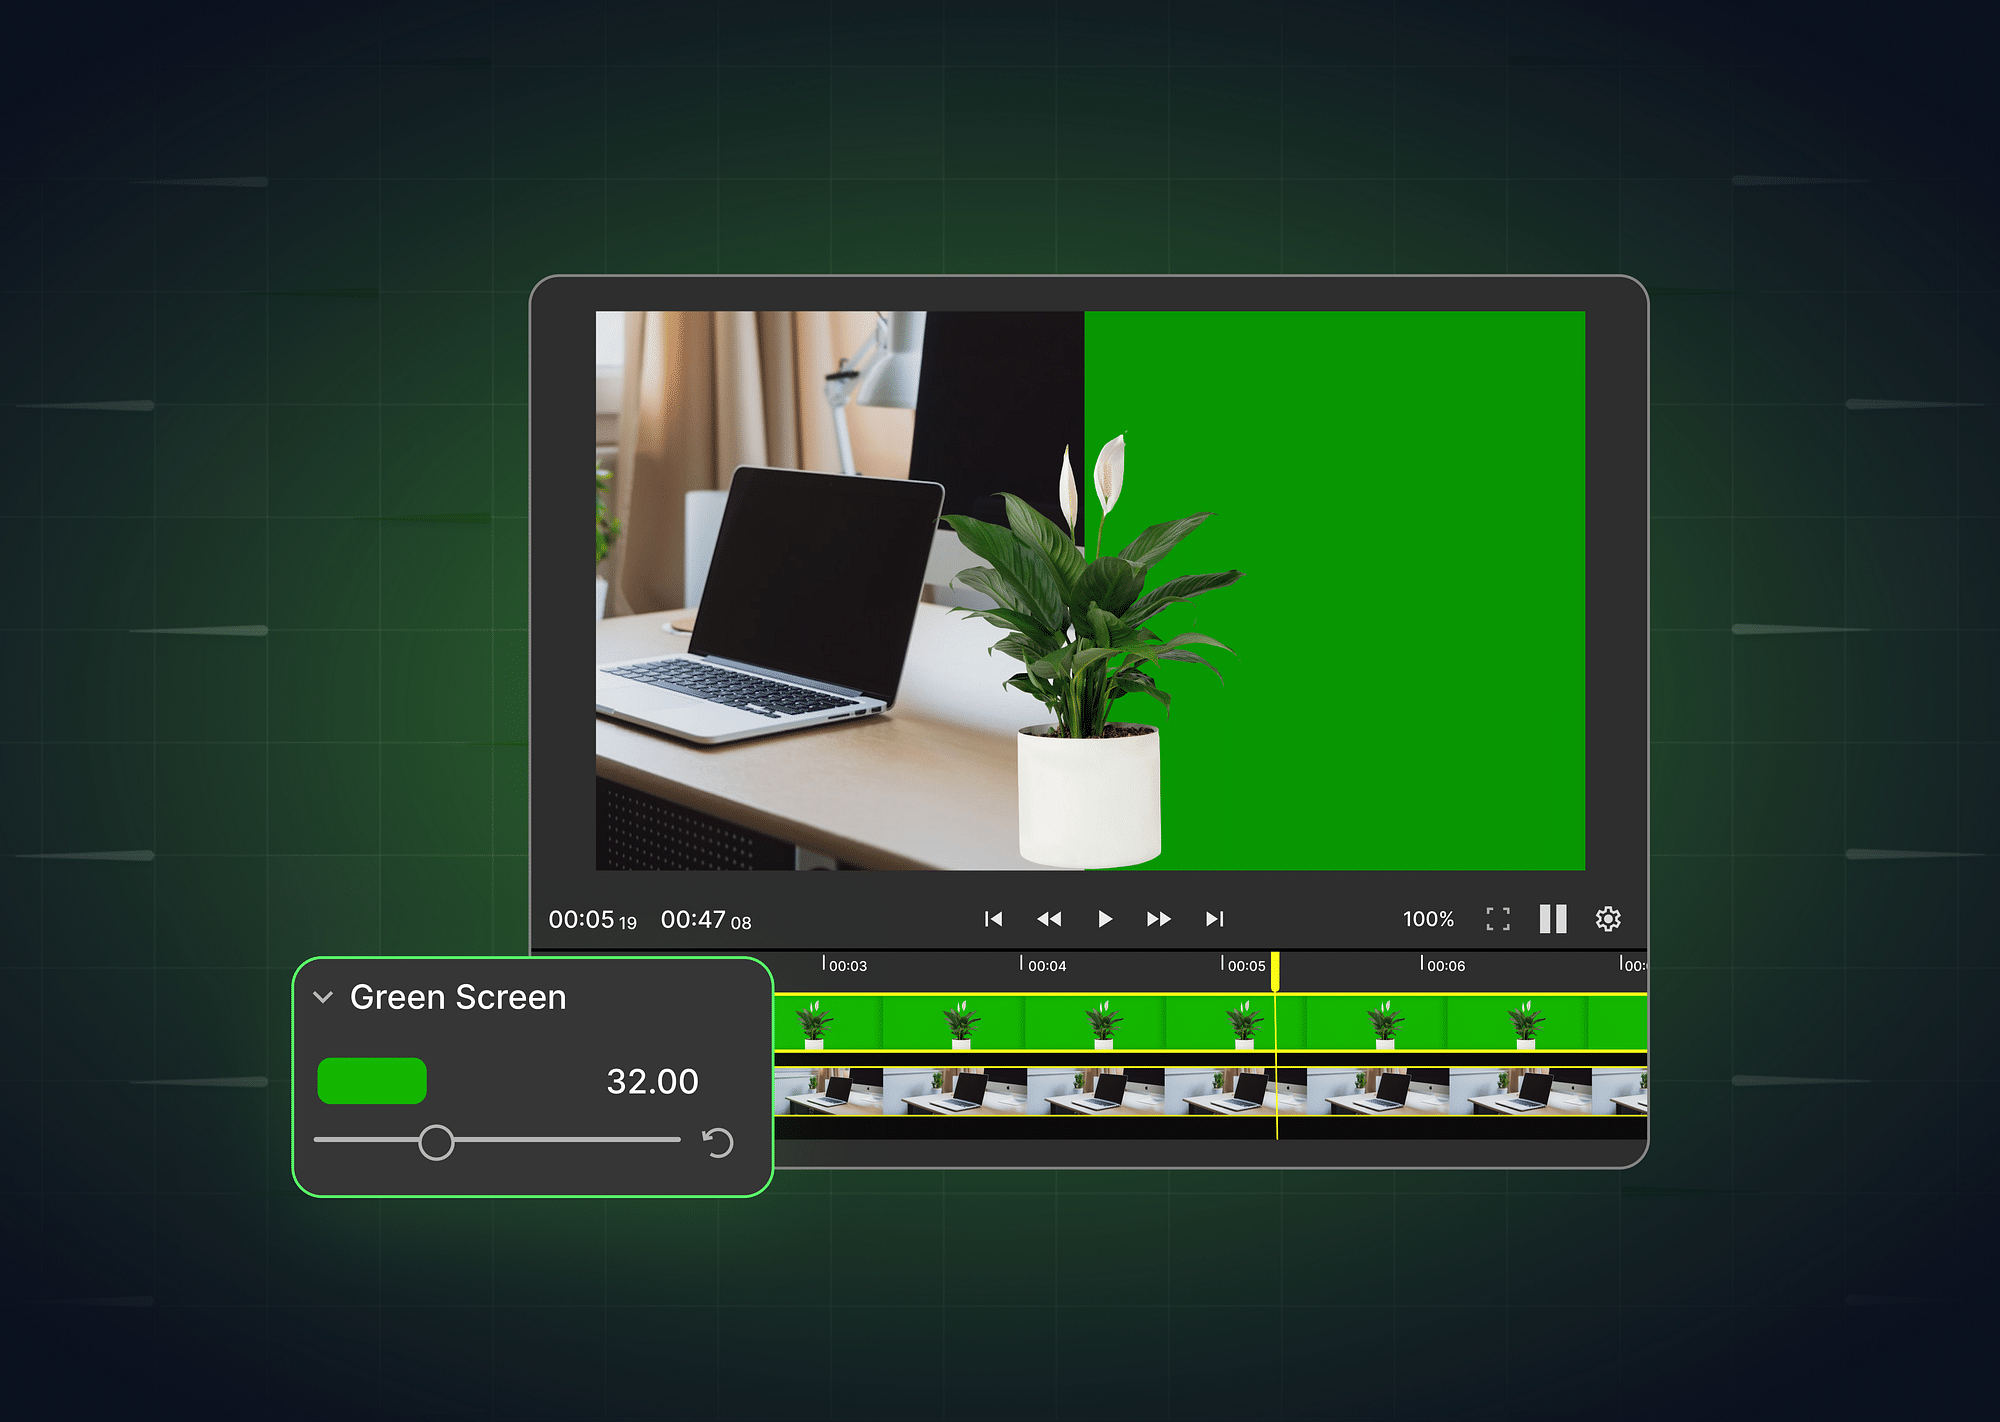
The green screen technique, also known as chroma keying, works by digitally removing the green screen background and replacing it with another visual layer. The software isolates and removes any green (or sometimes blue) areas, enabling editors to place any scene or effect behind the subject. The reason green is commonly used is because it differs significantly from most skin tones and clothing colors, reducing the chance of accidental transparency.
How to Use a Green Screen?
Using a green screen effectively is a careful process of choosing the right materials, setting up with precision, and achieving balanced lighting. Here’s a comprehensive guide to setting up a green screen and optimizing your setup for professional-looking results.
Choosing the Right Green Screen Material
Selecting the right material is a crucial first step. Common options include:
- Fabric: Fabric green screens, typically made from muslin, are a popular choice due to their versatility, affordability, and ease of handling. They’re ideal for creators who need a portable setup, but it’s essential to ensure the fabric is stretched tight to avoid wrinkles, as these can interfere with the editing process.
- Paper: Paper rolls offer a smooth and consistent green surface, which makes them great for reducing shadowing and reflections. However, they’re less durable than fabric and can tear easily, making them less practical for long-term or portable use.
- Painted Backdrop: Painting a wall or board with chroma key green paint provides a completely flat, non-reflective surface, ensuring consistency and durability. This is a good choice for permanent setups but can be costly and time-consuming.
Each material has its benefits, so choose one that best suits your needs and shooting location. Always opt for non-reflective, high-quality materials to prevent unwanted glare and color inconsistencies.
Setting Up the Green Screen
Proper setup can make or break your green screen’s effectiveness. Here are two main methods:
- Hanging: Hanging a fabric or paper green screen from a stand or wall is one of the most common methods. Securely attach the screen with clips or hooks and pull it taut to eliminate wrinkles or folds, which can cause shadows and color inconsistencies.
- Standing: Portable green screens with built-in frames are convenient and quick to set up. These are ideal for temporary locations or smaller spaces where you may need to move or reposition the screen.
Ensure the screen covers enough area to frame your subject without cutting off the edges. If possible, give your subject some distance from the screen to prevent shadows falling directly onto it.
Lighting the Green Screen
Lighting is one of the most critical aspects of green screen use. To get a smooth and even background, you’ll need to follow these lighting techniques:
- Key Light: The key light is the main source of light on your subject and should be positioned at a 45-degree angle to one side of the subject. Make sure it does not spill over onto the green screen itself, as this could create uneven lighting on the background.
- Fill Light: Positioned opposite the key light, the fill light balances out shadows on the subject, creating a well-lit image. This light should be softer than the key light to avoid casting additional shadows on the green screen.
- Back Light: This is directed solely at the green screen to maintain consistent color and eliminate shadows. It ensures even lighting across the entire backdrop and prevents “hotspots” or dark patches that make editing difficult.
Consider using diffusers or softboxes to create even lighting without harsh shadows. Even lighting across the green screen prevents editing issues and ensures that your chroma key software can accurately remove the background.
Essential Equipment for Green Screen Setup
To achieve the best results with a green screen, here is a list of essential equipment:
- Green Screen Material: As discussed, choose a high-quality green screen material (fabric, paper, or paint).
- Lighting Kit: At least three lights (key, fill, and back light) to achieve balanced lighting on both the subject and background.
- Stands and Clips: For hanging green screens, sturdy stands and clips will keep the material stretched and smooth.
- Camera: High-definition cameras provide clear, detailed footage that makes the chroma key process easier.
- Tripod: A tripod keeps the camera steady, ensuring consistent framing and preventing any shakes that can interfere with editing.
- Editing Software: A green screen editor such as Adobe Premiere Pro, DaVinci Resolve, or iMovie will allow you to remove and replace the background with another image or video.
How to Set Up a Green Screen?
To set up a green screen, follow this step-by-step guide:
- Choose the Right Location: Select a location with enough space to place the screen, lights, and camera. Keep the screen at least 3-5 feet away from the subject to reduce shadows.
- Set Up the Green Screen Background: Whether hanging or using a portable setup, make sure the screen is stretched tightly to avoid any wrinkles. Wrinkles can cause unwanted shadows and make it harder to remove the background cleanly.
- Apply Proper Lighting Techniques: Position your lights as described above to ensure even lighting. The back light should eliminate any shadows on the green screen, and the key and fill lights should evenly illuminate the subject.
- Adjust the Camera: Place your camera on a tripod to avoid any accidental movement. Frame your shot so the subject is well-positioned within the green screen background, with some space around them to avoid “cut-off” edges in post-production.
- Green Screen Editing: Once your footage is captured, you’ll need a green screen editor to remove and replace the background. Here’s a step-by-step guide using Adobe Premiere Pro:
- Import Footage: Load your video into the timeline, along with the new background layer.
- Apply Chroma Key: Use the "Ultra Key" effect to remove the green background.
- Refine Mask: Adjust the tolerance, highlight, and shadow settings to ensure the green screen is fully removed without affecting the subject.
- Replace Background: Add the replacement image or video on a layer below the green screen footage for the final effect.
Setting up a green screen can be time-consuming, but the effort ensures your editing process goes smoothly and results in a professional-looking final product.
How to Edit a Green Screen Video?
Editing a green screen video is the final step to bring your scene to life by adding a new background, adjusting colors, and applying any effects that make the setting look natural and cohesive. Here’s a detailed guide on how to edit a green screen video effectively:
1. Choosing Editing Software
The first step is selecting video editing software with chroma key capabilities, as this feature allows you to isolate and remove the green background. Popular software options include:
- Adobe Premiere Pro: A professional-grade tool with advanced chroma key options, such as the “Ultra Key” effect, which provides precise control over green screen removal.
- Final Cut Pro: This Mac-based editor offers powerful chroma key tools for a seamless experience.
- iMovie: A user-friendly option for beginners that still includes a chroma key feature, ideal for simpler edits.
Once you’ve chosen your software, open it and create a new project, making sure to configure the timeline settings (resolution, frame rate) to match your footage.
2. Importing Footage
Next, import both your green screen footage and the replacement background. Here’s how to approach this step:
- Load Footage: Place your green screen video on the timeline as the primary layer, and add your chosen background on a layer beneath it.
- Organize Clips: Organize and trim any unnecessary parts to streamline the editing process. This initial organization will make it easier to edit without distracting extra footage.
Ensure that both the footage and background layers are properly aligned in terms of timing, especially if the background includes motion.
3. Creating a Mask Around the Subject
This step involves removing the green screen background by creating a mask around your subject:
- Apply the Chroma Key Tool: In Adobe Premiere Pro, apply the “Ultra Key” effect, located in the effects panel, to the green screen footage. In Final Cut Pro, use the “Keyer” effect, and in iMovie, you can select the “Green/Blue Screen” effect.
- Fine-Tune the Mask: Adjust parameters like tolerance, edge feathering, and softness to refine the mask. For example:
- Tolerance: Determines how much green the software removes. Increase it to cover any missed areas, but be careful not to affect the subject’s edges.
- Edge Feathering: Softens the edges of the mask to make the separation between subject and background look more natural.
- Shadow and Highlights: Use these settings to adjust lighting inconsistencies, ensuring the green is fully removed without compromising the subject.
Refining the mask ensures a clean separation between the subject and the background, making the composite appear more realistic.
4. Replacing the Background
With the green screen removed, it’s time to add a new background to bring your scene together:
- Add Background Layer: Position the background layer directly beneath your green screen footage in the timeline so it fills the empty space left by the removed green screen.
- Scale and Adjust Background: Resize and adjust the position of the background image or video to fit your scene. Ensure it aligns naturally with the subject and matches the intended perspective.
- Color Matching: To make the composite seamless, use the color grading tools in your editing software to match the lighting and color tone between your subject and background.
This step is crucial for creating a cohesive look, especially if the background includes lighting or color differences compared to the green screen footage.
5. Adding Special Effects
To enhance the final video, you can add effects that improve the realism and polish of the scene:
- Filters and Color Grading: Apply color grading to balance the tones and enhance the scene’s mood. For instance, if the background is outdoors, you might add a warmer filter to match natural sunlight.
- Transitions: Adding fade-ins or fade-outs can help transition the green screen footage with other clips or scenes.
- Additional Effects: Many editors add effects like blurring the background slightly to create depth of field, making the subject appear more integrated with the background.
Using effects thoughtfully can make the background look like it naturally belongs in the video, elevating the overall production quality.
Alternatives to Green Screen
While green screens are widely used in video production, other background removal methods can sometimes offer a better fit depending on your project, budget, and environment. Here are some effective alternatives:
1. Blue Screen
A blue screen works similarly to a green screen but can be more suitable in certain conditions. Blue screens are commonly used:
- When the Subject Contains Green: If your subject has green clothing, accessories, or props, a blue screen avoids removing those elements along with the background.
- In Low-Light Conditions: Blue screens can perform better in low-light settings because blue reflects less light than green, which reduces unwanted reflections on the subject.
Like green screens, blue screens require proper lighting and setup to avoid shadows and ensure a seamless background replacement.
2. LED Video Walls
LED video walls are a sophisticated and increasingly popular option in high-budget productions, allowing real-time background adjustments. Key benefits include:
- Dynamic Backgrounds: LED walls display high-resolution images or videos as the actual background, eliminating the need for post-production editing to replace the green or blue screen.
- Realistic Lighting and Reflections: LED video walls naturally reflect light onto the subject, creating a more realistic look and blending the subject with the background.
LED video walls are ideal for productions where creating an immersive environment is critical, but they require significant investment and technical expertise, making them more common in studio and blockbuster movie settings.
3. AI Background Removal
AI-driven background removal is a highly accessible, cost-effective alternative that doesn’t require a physical screen. Many platforms and applications now use AI to detect and remove backgrounds automatically, making it perfect for casual or fast-paced productions. Popular tools include:
- Zoom and Google Meet: Both platforms offer live background replacement using AI, ideal for remote meetings or live streaming.
- Canva and Remove.bg: These tools use AI to identify and remove backgrounds from images and videos quickly, great for social media or marketing content.
- Video Editors with AI Features: Programs like Adobe Premiere Pro and Filmora are increasingly incorporating AI background removal, which can be a time-saver for editors.
AI background removal works well for simple scenes and close-ups but may struggle with complex shots or low-resolution footage. It’s a practical choice for on-the-go editing or projects where traditional green screen setups aren’t feasible.
Each of these alternatives offers unique benefits that can enhance your production based on the project’s scale and technical needs. For large productions, LED walls create a polished, immersive experience, while AI removal tools provide flexibility and convenience for quick edits.
Best Green Screen Tips
To make the most of your green screen setup and ensure professional-looking results, here are some essential tips and troubleshooting strategies:
1. Avoid Shadows
Shadows can disrupt the smoothness of your green screen background, leading to patchy or inconsistent color during editing. Here’s how to avoid them:
- Even Lighting: Use multiple lights to illuminate both the subject and the green screen evenly. Aim for uniform lighting across the entire screen to eliminate shadows that might interfere with background removal.
- Subject Positioning: Keep your subject at least 3-5 feet away from the green screen to prevent casting shadows directly onto it. This separation also helps reduce the likelihood of “spill” (green reflections on the subject), which can affect the quality of the key.
2. Plan Your Shots
Planning your shots ahead of time can save considerable editing work and enhance the final result:
- Visualize the Scene: Before filming, envision how the subject will interact with the new background. If the subject needs to move, ensure they remain within the green screen area.
- Camera Angles and Movements: Avoid dynamic camera movements like panning or zooming unless you have advanced tracking software. Simple, stable shots work best, especially if the background will have static elements.
Planning ensures the subject fits seamlessly within the scene, creating a cohesive effect once the background is added.
3. Avoid Green Clothing and Props
Any green on the subject or props will blend with the green screen and disappear during editing. To prevent this:
- Choose Contrasting Colors: Use colors that contrast with the green screen to keep all elements of your subject visible. Shades like blue, purple, and warm tones work well.
- Use Non-Reflective Props: Avoid highly reflective surfaces that might pick up a green hue from the screen, as this could interfere with the editing process.
Ensuring the subject’s attire and props don’t match the screen color will make the chroma key process smoother and avoid unintentional transparency.
4. Ensure High Resolution
A high-definition camera captures more detail and provides a cleaner edge when keying out the green screen:
- Use HD or 4K Resolution: Higher resolution footage offers more data for the chroma key tool, resulting in sharper, more precise masking around the subject.
- Avoid Compression Artifacts: If possible, avoid compressing your footage, as this can create pixelation or noise that makes green screen removal more difficult.
Shooting in high resolution makes the final product look sharper, and it’s especially beneficial if the subject has intricate details or the background is highly textured.
5. Test and Adjust
Finally, running test shots and making real-time adjustments can save time and frustration:
- Test Lighting and Positioning: Take a few test shots to check for shadows, hotspots, or green spill. Adjust lights or move the subject until the background is uniformly lit.
- Check Keying Settings: If using software with chroma key effects, try different settings to see how they affect the mask. This can help you get a cleaner mask with minimal editing needed.
Testing ensures that all aspects of the setup are working together smoothly, helping you spot potential issues before you start recording the main content.
Conclusion
Using a green screen can be a game-changer for video production, adding a layer of creativity and professionalism that elevates your content. When set up and executed correctly, green screens allow you to seamlessly replace a plain background with any location, setting, or effect imaginable—whether you’re aiming for a realistic scene or an abstract, fantasy environment. With the right equipment, careful lighting, and thoughtful editing techniques, even simple footage can be transformed into visually captivating content that engages your audience.
FAQs
1. Does a green screen have to be green?
No, blue screens are also commonly used. However, green is often preferred as it contrasts well with skin tones and clothing.
2. What is the best green screen video editor?
Adobe Premiere Pro, Final Cut Pro, and iMovie are popular choices for green screen video editing.
3. Can I use a green screen with my phone?
Yes, many mobile apps, such as Kinemaster or PowerDirector, support green screen editing, allowing you to create effects on the go.
4. Why use a green screen?
Green screens offer flexibility, enabling creators to add any background or effect, transforming simple footage into high-quality content.


